Monday, December 17, 2018

Holiday Art: Snow Globes

During the holidays, our students get so excited about the occasional snowfalls we get here in NC, all of the holiday lights and decorations, and just the overall hype of family time coming up. That all being said, we like to offer some easy and festive art that is simply fun for these children who are all so anxious for the holidays to officially begin.

First, I prepared the materials in advance. I cut circles out of light blue card stock for snow globes, followed by a curved trapezoid shape for the base of the snow globes. Then, I had some green triangles cut out along with little white circles for snow balls.


The kids could use glue and stickers to design a little snow scene in their paper globes, along with markers and colored pencils to add some detail.


As always, the kids were very proud of their artwork, each scene being colorful and unique from each other's. They were delighted to bring their artwork home to add to their own decor. 


Thanks as always for reading along, and I hope that you got some fun ideas for your own activities!

Happy Holidays,
Angelique

Monday, July 9, 2018

Mixed Medium: Yarn & Oil Pastels Art Activity

During summer camp this year, our students learned how to use oil pastels by coloring and blending with a blending tool. We offered card stock and encouraged our students to get creative with their designs.

Afterward, in small groups, I poured tacky glue on each child's art work and gave them a paint brush to spread out the glue. Tacky glue has this way of brightening up colors, creating a glossy surface once it dries. I offered colorful yarn cut at 3 inches or so for my students to add to the abstract art by creating curvy and straight lines on top of their colorings.


After the artwork dried, we presented the artwork on a larger piece of card stock to offer a frame to the artwork and voila!


This activity worked out very nicely in small groups with kids ages three through five years old. They had a lot of fun with the process and they were very proud with the finished product.


Thanks for stopping in and I hope you got some ideas for your own projects!


Angelique Bowman

Thursday, July 14, 2016

Classroom Circus Party Ideas

Vintage Circus Party for Kids & Parents

A couple of years back, I decided to convert our entire Montessori classroom into a circus party room for our annual party that we throw at the end of the traditional school year. I improvised with whatever random material that I had collected over the years, and I'd say it turned out to be a very special day for both the students and their parents! I was recently reminded of this party while rummaging through old photos, and thought I would share it with anyone into vintage circus themes.

First Things First: Send Out Invites for a Vintage Circus Party, Costumes Welcome!
Give at least a month's heads up for parents to help their kids be part of the show by offering a list of vintage costume ideas. Give them a list of old timey circus performers. I've started a list for you here:

Circus Performers
-Ring Leader
-Strong Man
-Jester/Joker
-Mime
-Masquerade/Harlequin
-Tight rope walker
-Elephant
-Lion
-Clown

Get creative and be festive!


How I turned Our Montessori classroom into a Circus Room for One Day

  • Turn the shelves! First off, I turned every shelf backwards, pressed up against the walls so that our school material was out of sight. Any shelves that I could not turn had sheets draped over them. 
  • Warm white holiday lights to brighten the room. We Draped strings of lights on a wall with some tacks, and then we added a white sheet to hang over them like a curtain. This creates a fun soft look that serves as a great backdrop for a photo station. 
  • Sheets and fun fabrics to cover the tables and areas of clutter. Think about the old vintage circuses that were made out of fabric tents, and drape fabrics wherever you can. While we couldn't quite bring a tent into our classroom room, the touch of fabric gave a tent-like feel to the room. 
  • Fortune station for two. Make a fun fortune teller station by throwing a pretty cloth over a round table with two chairs. In the center of this table, I took a thick glass crystal-style candle holder and flipped it upside down. I stuffed a small strand of warm christmas lights inside of the holder and wrapped a soft velvety fabric around the wires. Instead of Tarot cards, I just offered a standard 52-card deck where the kids could match the suits or play a simple card game with mom or dad. Our kids are pretty young- between 2 through 6, so the youngest especially just preferred to play a silly game with a parent at a fancy table with a globe. 
  • Decorative globes throughout. To add more fun sensorial elements for kids, I placed globes in  bowls or candle holders to serve as a stand. I used large sturdy Christmas ornaments, decorative glass blown globes, and water-filled glitter balls to brighten up the classroom. 
  • Hula hoops & dancing ribbons! You've got to add some fun activities to help the kids feel like they are part of the circus, and we find that hoops and ribbons are always a hit! Of course, some of us teachers also had fun dressing up in costume and performing for the kids :-)
  • Random photo corners. I cut diamonds out of craft paper and folded them over a long string to make the triangle banners used for areas to take photos. I found whatever decorative objects I could find to add elements that would make the photos more fun. In the photo above, I made a bench out of a shelf by adding cushions, throw pillows and fabric. Below, I simply added a chair that could be shared with a child. We also had empty frames available for props. There was a spotlight off to the side in the image below to create a more dramatic lighting. Parents loved taking photos with their kids on the last day of school, and they really made use of these simple backdrops. 
  • Costume station: festive fabrics, scarves, shawls, capes, and masks. A piece of unique fabric can be a creative tool for any child. You can get some random yards of fabric from your local fabric store, or see what scarves you have around the house that the kids might enjoy turning into capes, skirts, head dresses, etc. We cut some masquerade masks out of colorful foam sheets as you can see in our top photo. We added sticks to them so that the kids could hold them to their faces. We also happened to have some silly mustache masks to throw in there as well :-)

We added a mirror in the corner for the kids to see themselves in costume.

  • Head in the Hole! If you have an artist on staff, you could paint up a fun circus image for the kids to pop their heads in. I painted this lady on some cardboard and the kids had a blast with it. Search for "head in the hole" on Pinterest for other fun ideas. 

  • Walk the rope! For our little acrobats, we stretched a rope across the floor for them to pretend to walk a tightrope as they practiced balancing.
  • Balls, balloons, foam building blocks, puppets, and anything that allows kids to put on a show! We placed random material over our circle time area rug to allow kids to build and get creative. 
  • Vintage looking accents that set the mood. In the photo above, we found an old chandelier and wrapped twinkle lights around it. Old picture frames and unique objects that look vintage can add so much to the desired mood of your classroom. 

The kids had such a blast!
  • Hang a Play Parachute! Okay, I admit, this is a little ambitious and perhaps a little over the top. If you happen to have a parachute around, this is a project for at least 2 people and some ladders to nail or wire a parachute overhead. I attached long pieces of craft wire to the ends of each handle and tied the craft wire to heavy curtain rods, tops of cabinets, wall hangings, etc. Depending on what you have to work with, you just have to get creative. 
  • Food and Refreshments. Don't forget the popcorn! 

I hope you have been inspired to get creative! If you run into a bind, just count on Pinterest to the rescue! The party ideas are endless... Thanks for reading along!


Cheers,
Angelique Bowman

Friday, April 10, 2015

Wallets Crafted by Kids!

Sewing Activity for Kids ~ Customized Wallets

Early Childhood Activity to Refine Fine Motor Skills

For years, I have been teaching kids basic stitches with large needles, and sure enough, my students have shown remarkable progress in their fine motor skills within weeks.  I find that foam sheets are a great start to introducing basic sewing stitches as it does not take much effort to push a needle through this flexible material.  Using large plastic needles are great, but children also work just as well, if not better, with the largest needles found in an assorted needle kit.  This has been a successful and demanding activity for all students in my Montessori studio with children ages 3 through 6.  For the best results, I recommend this lesson to be taught in small groups or individually when being introduced for the first time.  This definitely needs some prep time and takes patience.  I usually give myself 15 minutes of prep time to get a few wallets started for sewing. 


Preparing Foam Sheet Wallets for Kids to Begin Sewing

  • Cut foam sheets into rectangles just small enough to fit in a child's pocket.  Choose multiple colors to give your students options.  I usually offer two different colored rectangles of the same size to choose from for the child to stitch together.
  • Cut out a long and narrow trapezoid on the long edge of one rectangle per wallet as seen in the image below.
  • Offer multiple colors of thread to choose from.  I find that embroidery thread is perfect for the larger needles.
  • Prepare threaded needles for younger students who have not yet been taught how to thread a needle.  I usually measure my thread at least 2 feet long before threading it.  
  • Layer your rectangles and begin a basic stitch such as the running stitch or overcast stitch, knotting the thread off just as I have below.  Most of my students do not yet know how to knot, so this gives them a head start.  
  • Draw a line for children to stitch along with a sharpie, about a half inch around, leaving the end with the trapezoid cut-out shape as the opening of the wallet.  You can either show the child how to stitch along the line by demonstrating about a half inch between each stitch or to make it even easier, you could make a dotted line instead.
 

Beginners Sewing Lesson to Make Customized Foam Wallets

  • Be sure to have prepared extra wallets; one for you and one for each child.  Have the children watch you sew an entire wallet before offering them to choose their own.
  • Give a rundown on safety with needles.  If you are a teacher, be sure to check with your school if needles are permitted.  We like to use felt sheets or rugs to place under the wallets for the child to push the needle into the soft surface.  Most children prefer working on the floor on a rug.  This is a great way to prevent them from encouraging them to hold the wallet in their hands and accidentally poking their fingers with the needle.
  • Demonstrate a running stitch and/or an overcast stitch.  An overcast stitch is what I typically show, since you never have to flip the wallet over.  I usually say something like this:  "Push the needle down into the line/dotted line, pull the needle and thread all the way through, and push it back into the line with a fingertip of space in between (or if the lines are dotted, show the child to go into the dotted line).  If you want to be more playful, you could treat the needle as the head of a snake or worm, and instead of telling your student to push into the foam with the needle, you could say "burrow the worm into the ground, pull his body all the way through, and dig another whole along the line/on the next closest dot."  
  • My students sometimes go back and forth between different types of stitching, and this is perfectly fine in my book, since they are just beginning to learn.  You will need to be available to them sometimes to show them how to get "unstuck" when they forget to pull the needle and thread "all the way through."
  • When the child has finished, knot the end for them and cut the extra thread off.  
  • Offer markers for coloring and customizing their wallets.


It's okay for beginners to go back and forth between basic stitches.  The whole point of this lesson is t to begin building coordination and it isn't easy at first.  


Some of the results might look a little muddy-- err, "abstract" is a better word, but the children take pride in building something functional :)


I hope this was helpful.  Please ask questions if I was unclear on something!  

I will warn you that if the child pulls the thread too hard through the foam that the foam could tear.  Have extra foam available for them to try again as we don't want to discourage them.  I find that when young children begin using a needle with thread, it forces their little finger to hold the needle in a way that compliments the way that we hold a pencil to write.  My students who have struggled with holding pencils have gained coordination through sewing, showing much improvement in holding their pencils, markers, and crayons.  


I hope this was helpful!
Angelique Bowman

Sunday, April 21, 2013

A Fabulous Fine Art Show by Kids, Ages 2 through 6


Our enrichment program recently put on our first official art show at Wonderland Arts.  The artwork was created by students ages 2 through 6 after lessons taught by 4 teachers of Wonderland Arts.  This includes our primary teacher of the 2's class, two primary teachers from the 3 through 6's class, and myself (the Little Wonders art teacher).  We all worked very hard to get this show up and running, and needless to say, it was a great success.  The kids had some amazing and original art that parents and friends appreciated.  Here are just some of the displays that we set up to give you a feel for the show.

The display above shows some of the finished products after I gave lessons on shading and highlighting. To learn more about this lesson, click here: Shading and Highlighting for Kids

The 3 through 6 primary teachers gave a lesson on melting wax crayons.  This technique is all over Pinterest and there are lots of great tutorials, so just search on Pinterest for melted crayon art f you are interested in tutorials.

To the left, we have some pastel drawings.  To the right, we hung watercolors, and on the stand are some objects on display painted with acrylic.  This grouping was all made by ages 2 through 3 during lessons in my studio.

Created by ages 3 through 6 with our primary teachers, what you see here is some fun and colorful sand art.

Yarn bottles were also done by ages 3 through 6 with the primary teachers.  To learn more about this lesson, I made a tutorial here: Yarn Wrapped Bottles

On the walls above are some more pastels done during my classes, along with painted objects on display, all created by ages 3 through 6.  To learn more about how I teach pastels, click here: Lessons on Pastels   and if you are curious about teaching acrylics to kids, I mention some techniques here: Acrylic Paintings Lesson

Abstract shape art painted with acrylic on cardboard by ages 3 through 6 during my Little Wonders classes.  To learn more about this process, visit my post here: Abstract Shape Art

To the left, images with the black matting were created by 2 year olds with our primary 2's teacher, after she gave some experimental art lessons with paints and glues.  To the right are some more abstract shape paintings by the 2's class.  

These are some of the acrylic painted objects my students ages 2 and 3 worked on.

Wooden wall hangings painted in acrylic, by my students ages 3 through 6.  

More acrylic objects by ages 3 through 6

People in action, mingling and enjoying our gallery set up on the opening day

Our primary teachers who work with ages 3 through 6 worked with the kids to prepare some delicious treats during the art show.  

Thanks for visiting and checking out our art show!  We hope you were inspired!

~Angelique Bowman & the Wonderland Arts Team

Wednesday, March 27, 2013

Abstract Acrylic Paintings on Cardboard: Lesson for Ages 2 through 6

While the my students (ages 2 through 6) have been learning about color pallets with acrylic paint, how to mix acrylic and utilize different brushes and pallet knifes, I have offered a variety of different projects to help them practice these techniques.  This was a fun 2-3 session project that my students worked on they for our annual art show.


If you want to give this a try with your little ones, this is a fun abstract art lesson that will need some prep time by a teacher.

Materials:

  • Cardboard about the thickness of a typical large pizza box (and not so thin like a shoe box).  Actually, I collected the lids of pizza boxes to use for this project.  Cut some of it out into large rectangles or squares for work surface for the kids, along smaller pieces cut into shapes around 1 to 2 inches in diameter.
  • Scissors 
  • Paints.  We used acrylic, but tempera will do.  
  • Paint brushes for painting
  • Paint trays (we use plastic lids from containers like hummus and margarine)
  • Glue like tacky or modge podge for glueing the shapes. I'm sure regular school glue will be fine, too.
  • Q tips or old brushes for using glue
  • Cans for water and for glue.  I used old tuna cans.
  • A couple sheets of paper towels or one rag for each child to wipe access water and paint onto
  • Protective sheets to cover tables and protective smocks or t-shirts for kids to wear using acrylic paint 
  • Markers & Crayons (Optional.  My kids wanted to color on their cardboard as they waited for the glue to dry before painting on them)
I have all of the lessons, preparations, and steps typed out which I will gladly forward to you if you are interested in specifics on how to put this together for ages 2 through 6, but if you are just improvising, have fun with it and just get ideas from the photos below. 

After the shapes are glued on their work surface, the kids are offered acrylic paint to turn their work into a colorful abstract piece.

I show my kids how to clean their brushes and wipe off excess water before dipping into acrylics.

Here are a few of the finished products of the abstract shape art.  These pieces were on display for our annual art show.  To see more works from this show, click here: Photos of Wonderland Art Show

Thanks for visiting!
~Angelique Bowman


Wednesday, March 20, 2013

Lesson on Highlighting, Shading & Blending: Ages 2 through 6

 I had prepared a spot for each child at the table with these drawing tools: An artist graphite pencil, a writing pencil, a store bought blending stick, a handmade blending stick, a piece of white charcoal, grey paper which I taped to the table for stability, a folded up paper towel, and objects for my students to try to draw.  Scroll down for more images and techniques on giving this lesson.

This was an experimental lesson to teach my students a few drawing techniques that many artists use when creating different dimensions, especially in realism.  During my lesson, the kids were shown various graphite drawings and charcoal drawings by a number of artists.  I pointed out different levels of lightness and darkness throughout the work and talked about where the light source was coming from.  I also had some fake fruit handy (from the kids' play kitchen), and put a spotlight on the fruit to point out how it is much brighter on one side than the other.  They took note of where the shadows were made and many were able to point out where the light source was coming from in several pictures that were shown.  Finally, I showed them how to use some of the drawing tools that I offered and demonstrated how to use them on some grey art paper.  I would suggest any colored paper except for white, because the white charcoal will not show up so much on white paper.  If you are interested in trying out these things, I made a list towards the bottom of this post on how the material was presented.

Okay, so you might be thinking to yourself, how should we expect these kids to understand this stuff?  First off, you can't typically expect something "realistic" to come out of this age group.  However, you can expect that the kids will gain knowledge and a better understanding of how things are made.  This is the age where kids are consuming so much information, even if their little fingers aren't quite coordinated physically to create exactly what you are showing them.  Many children will experiment with some of the ideas that you show them, and they will likely do their own thing, too, which leads them to open new doors of creativity that perhaps they didn't know they had.  After most of my fine art lessons, I find that children think more about the dimensions they are drawing/painting/etc., as well as the meaning of the art.  In the moment, they feel that their work is special, regardless of what anyone else thinks it looks like.  And when they think it's special, they are proud of themselves!  That said, on many levels, art is an important subject for children as it can give them a sense of pride in their work and more importantly, in themselves.

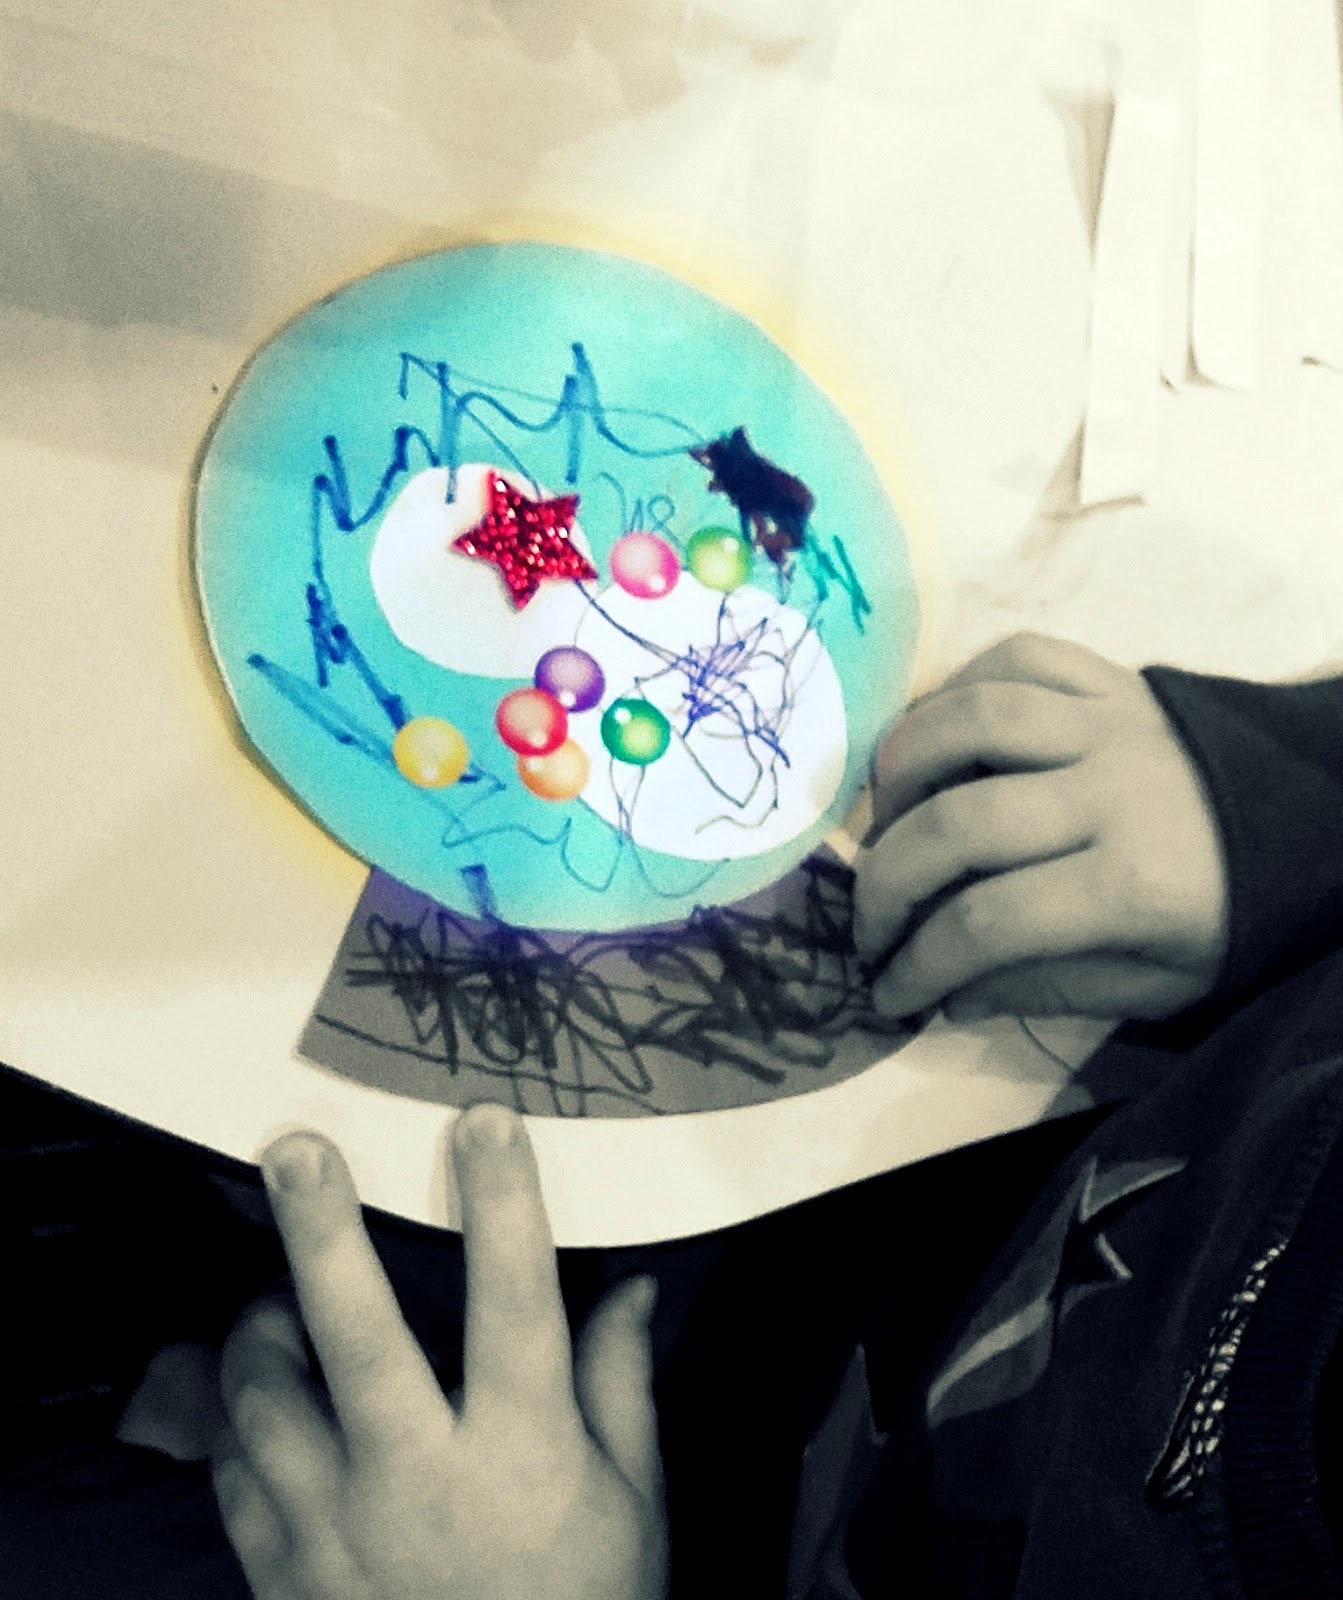
When I offered the fake fruits and vegetables for the kids to draw, some of them tried to trace the shape in order to make it "life like."  This was not something I suggested, but I thought it was an interesting way for them to explore drawing from still life.

For you teachers out there, get creative and teach this in whatever manner you choose.  Here are some ways I showed my students how to work with the tools:

An Artist Graphite Pencil & a normal, Everyday Writing Pencil (led or graphite will do): My artist graphite pencil was a 4B and I would suggest this grade or anything darker, as long as it is more contrasting than the writing pencil.  I showed my students a grading scale from light to dark with each pencil to compare the densities.  I wanted them to recognize that there are special pencils out there specifically for drawing that can give them more variety in lightness and darkness.  You may want to point out that you are gently pressing your pencil down for the lighter areas (when making a grading scale) and you are pressing down harder with your pencil as you get darker.

Blending Sticks:  I offered both store-bought blending sticks from an art store, and then I made some larger ones to experiment with to.  To make your own blending sticks, first tear some news paper into a large triangular shape.  I suggest tearing over cutting as it will help create a softer tip once you've rolled it up.  Begin rolling from one of the points, and just try to keep it rolling tight, more so on one end, to create a long and narrow cone.  Tape the end of it, and if your point is a little too narrow or flimsy, it won't hurt to just snip it off and shorten it a little with some scissors.  Show the kids how the blending sticks can smudge or blend in pencil markings to create shades and shadows.

Folded Up Paper Towel:  I folded a paper towel up into a small square and showed the kids how this can also be used to blend pencil marks.  The kids can experiment with the different textures that each blending tool has to offer.

White Charcoal: A piece of chalk might also do as a substitute.  I mentioned to the kids how the light areas on the drawing could be blended with the charcoal.  I also showed them how the paper towel works best for blending the charcoal in.


I hope this was helpful!  Contact me with any questions!

Thanks for reading,
Angelique Bowman


©2013 Angelique Buman Studio Lessons with Little Wonders: All work offered on this blog is offered as lessons written by Angelique Buman.  If you are interested in purchasing more thorough lessons on fine art for kids, please contact Angelique Buman.